We spent the first six months with our wire saw convinced that faster wire speed always meant faster cuts. Then we ran a batch of sapphire wafers at 70 m/s and watched the sub-surface damage rate triple compared to the same run at 45 m/s. The diamond wire cutting process isn’t about brute force — it’s about understanding what’s actually happening at the contact zone and matching your parameters to the physics of the material.
Most operators treat diamond wire cutting like any other machining operation: set the speed, set the feed, hit start. That works until you switch substrates, or until your wire life drops from 7 days to 3 and you can’t figure out why. The difference between a tuned process and a mediocre one comes down to three things: the mechanics of material removal, the thermal dynamics inside the kerf, and the trade-offs between speed, quality, and tool life. This article covers all three — with specific numbers from cutting applications across silicon, optical glass, ceramics, and graphite.
How Does the Diamond Wire Cutting Process Actually Remove Material?
When you look at the kerf under magnification, it’s not a clean slice — it’s a trail of microscopic destruction. The diamond particles don’t “cut” in the way a lathe tool does. They fracture, plow, and grind the material away at thousands of contact points per second. The physics splits into two distinct mechanisms depending on what you’re cutting.
Brittle fracture: the dominant mode for hard materials
This is what happens with quartz, silicon, sapphire, and most advanced ceramics. When an exposed diamond particle hits the surface, the localized contact stress spikes to somewhere between 5 and 10 GPa — well above the fracture toughness of these materials, as characterized by testing methods outlined in ASTM C1421 for advanced ceramics. The crystalline structure doesn’t deform — it cracks. Lateral and median cracks propagate from the impact point, and small chips break away.
This is the basis of the “cold cutting” claim. The energy is concentrated strictly at the fracture point. There’s no broad heat-affected zone, no phase transformation in the substrate. A silicon wafer sliced this way retains its original crystal structure within microns of the cut surface.
We see this play out clearly on our production floor. Sapphire and SiC substrates come out of the saw with no visible discoloration, no warping — the bulk material genuinely stays near room temperature even though the contact points are hitting 400-800°C momentarily.
Plastic deformation: for softer or composite materials
Some materials don’t crack — they deform. Softer metals, certain polymers, and composite layers yield to the diamond grit through plastic displacement. The abrasive plows a groove rather than shattering the surface. This generates marginally more heat per unit of material removed and produces different chip morphology (continuous ribbons instead of brittle shards), but it’s still far cooler than conventional grinding.
Fair warning: ductile chips are harder to flush from the kerf. If you’re cutting a composite with both brittle and ductile phases, expect to spend more time tuning your coolant flow to prevent chip re-embedding. We learned this the hard way on a ceramic-metal composite — the metallic chips were wrapping around the wire and causing secondary abrasion until we bumped coolant flow from 40 L/min to 65 L/min.
Why exposed diamond grit matters
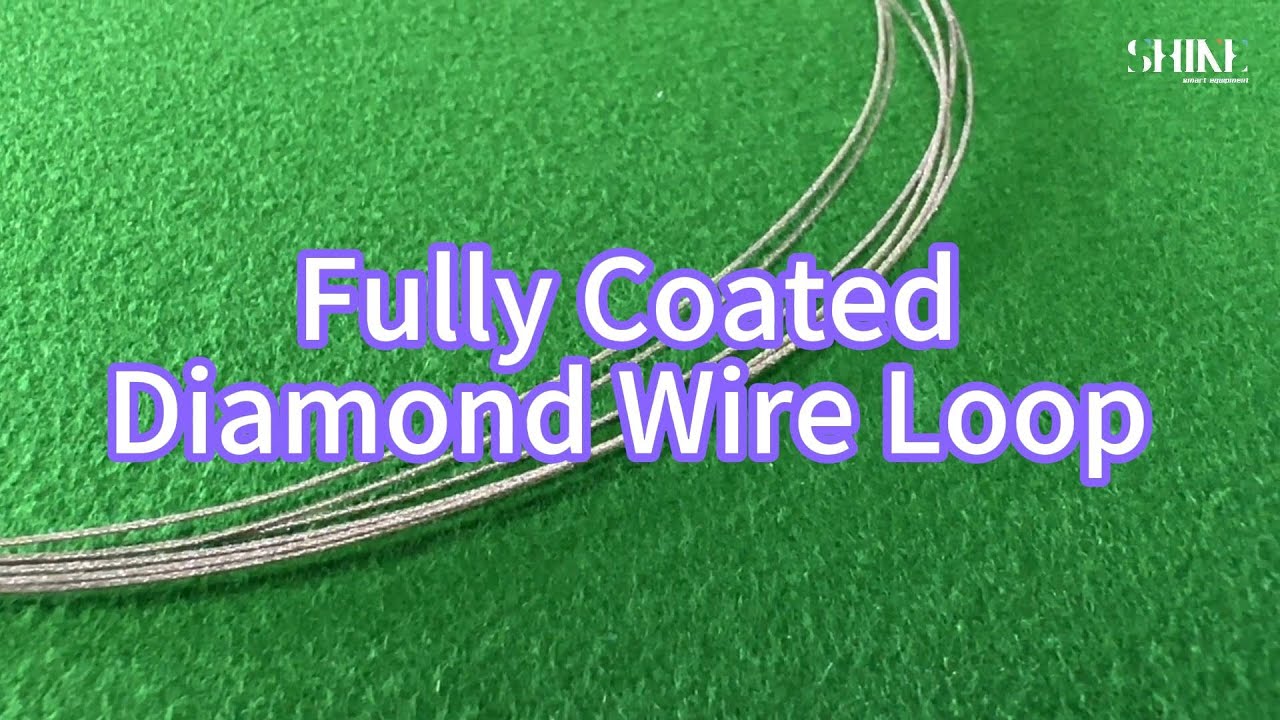
This is where endless diamond wire loops differ fundamentally from traditional spool-based wire. On conventional reel-to-reel wire, the diamond particles are largely encapsulated inside the nickel plating — only the tips poke out. The plating has to grip each particle tightly because the wire is manufactured in kilometers-long runs at high speed.
Our electroplated loops use an open coating approach: the polyhedral diamond crystals sit on top of the nickel layer with sharp edges and faces fully exposed. The critical parameter is protrusion height — how far the crystals extend above the bond surface. We target 30-50% of the diamond particle diameter. For a 40μm diamond, that means 12-20μm of exposed crystal.
Too little protrusion and the wire glazes — it slides across the surface without biting. Too much and the diamonds pull out under load. Getting this right means the wire cuts aggressively from hour one without a break-in period, and maintains consistent performance across its lifespan.
What Happens Inside the Kerf During the Diamond Wire Cutting Process?
The material removal isn’t a single event. It’s a continuous cycle of three stages happening simultaneously across the cutting zone.
Stage 1: initial contact and crack initiation
As a single exposed diamond particle enters the cutting zone, it makes contact with the substrate. The localized stress at the contact point spikes to 5-10 GPa. In brittle materials, this immediately triggers microscopic lateral and median cracks radiating from the impact site.
Stage 2: stable removal and chip formation
Multiple particles are working the kerf simultaneously. The microscopic cracks from adjacent particles intersect, and material breaks away as tiny chips. Because the endless wire runs in one direction (no reciprocation), this removal is stable and predictable — you don’t get the directional marks that show up on reciprocating wire saws. The surface quality stays consistent across the entire cut depth.
The chip morphology matters for clearance. Brittle materials like optical glass and silicon break into tiny, irregular shards — easy to flush. Ductile materials form continuous ribbons that can clog the kerf if coolant flow isn’t aggressive enough.
Stage 3: heat evacuation and particle wear
The friction of the diamond wire cutting process generates real heat at the contact points — roughly 400-800°C at the diamond-substrate interface. But because the wire is moving at up to 85 m/s and carrying coolant into the kerf continuously, this heat is evacuated almost instantly. Less than 100 microns from the cut surface, the material is at room temperature.
Over time, the sharp edges of the exposed diamonds round off due to friction. When wear reaches a critical point, the grit starts rubbing rather than shearing. You’ll notice this as a gradual increase in feed force for the same cutting rate. Eventually the wire needs replacement — though closed-loop wires experience significantly lower consumable wear than spool-based alternatives because the unidirectional motion eliminates the repeated acceleration-deceleration cycles that accelerate particle fatigue.
Why kerf fluid dynamics are critical
Without proper flushing, chips get crushed repeatedly inside the kerf. This destroys the wire and ruins the workpiece surface. Our machines use an integrated water tank with filter screen and recirculation system. We recommend white mineral oil or industrial white oil for most substrates — it flushes chips, lubricates the exposed diamond faces to reduce friction, and maintains thermal stability in the cutting zone. (For a detailed breakdown of coolant selection and flow optimization, see our cooling and lubrication guide.)
Flow rates typically run 40-80 L/min depending on the material and cutting speed, with inlet temperatures held between 15-25°C. We had one customer running sapphire with coolant at 32°C in summer — surface roughness jumped 40% until they added a chiller.
Key Parameters That Control the Diamond Wire Cutting Process
Four parameters drive everything. They’re interconnected — adjusting one without adjusting the others is how you get into trouble. (For detailed parameter tuning guidance, see our wire speed, tension, and feed rate guide.)
Wire speed
Wire speed dictates how much kinetic energy is delivered to the kerf per unit time. Our closed-loop systems can reach up to 85 m/s — roughly 4x faster than reciprocating spool saws, which top out around 20 m/s.
But faster isn’t uniformly better. The optimal speed depends heavily on the substrate:
| Material | Optimal Wire Speed | Why |
|---|---|---|
| Silicon crystal | 45-75 m/s | Balances removal rate with sub-surface damage control |
| Optical glass (BK7/K9) | 30-60 m/s | Higher speeds risk micro-chipping at entry/exit |
| Sapphire | 35-55 m/s | Conservative speed minimizes SSD on this expensive substrate |
| Graphite | 40-70 m/s | Can push higher; dry cutting means less thermal concern |
We ran a head-to-head on optical glass: 60 m/s gave us a mirror-smooth surface with no visible cracks. At 80 m/s on the same piece, we started seeing edge chipping. The extra speed wasn’t worth the reject rate.
Feed rate
Feed rate is the speed at which the workpiece advances into the wire (mm/min). Push too hard and you overload the diamond particles — the wire deflects, TTV (total thickness variation) goes out of spec, and you risk snapping the wire entirely.
Material properties dictate the range:
| Material | Feed Rate Range | Notes |
|---|---|---|
| Optical glass | 2-10 mm/min | ~10 mm/min is practical max for BK7 |
| Quartz | 2-10 mm/min | Similar to glass; prioritize stability |
| Advanced ceramics (sintered) | 2-10 mm/min | Conservative feed, prioritize surface integrity |
| Graphite | 50-100 mm/min | Much more aggressive; graphite is cooperative |
| Magnetic materials | 1.5-3 mm/min | Slow feed prevents edge chipping |
One gotcha: if you’re cutting very thin slices (0.1mm or less), drop both the feed rate and the wire diameter. We use 0.35mm wire at reduced feed for thin magnetic material wafers — anything thicker deflects too much and the wafer comes out wedge-shaped.
Wire tension
Tension keeps the cut straight. Our machines use automatic tensioning systems — servo motors or pneumatic cylinders depending on the model — to maintain the wire’s rigidity during the cut. (For calibration procedures, see our wire tension calibration guide.)
Low tension lets the wire bow, producing a curved cut. Over-tensioning accelerates core fatigue and risks snapping. The sweet spot depends on wire diameter and material:
| Material | Tension Range | Wire Diameter |
|---|---|---|
| Optical glass | 100-140 N | 0.35-0.6 mm |
| Quartz / Ceramics | 150-200 N | 0.55-0.8 mm |
| Graphite | 150-200 N | 0.6-1.0 mm |
| Magnetic materials | 100-150 N | 0.35-0.5 mm |
With proper tension, our machines hold positioning accuracy within ±0.01mm across multiple passes and cutting precision tolerance of ±0.03mm. Those numbers go out the window if tension drifts — which is why we use closed-loop automatic tensioning rather than manual adjustment.
Cooling system
Coolant volume and temperature control the thermal stability of the diamond wire cutting process. Our systems support oil-based fluids, water-based coolants, and even dry cutting for materials like graphite and porous metals that don’t tolerate liquid.
For most substrates, white mineral oil at 40-80 L/min and 15-25°C inlet temperature works well. The coolant does three jobs simultaneously: flushing chips from the kerf, lubricating the diamond faces to reduce friction wear, and keeping the micro-environment thermally stable.
One detail that’s easy to overlook: coolant concentration. Too much lubricant coats the exposed diamond faces and replicates glazing symptoms — the wire slides instead of cuts. We’ve seen operators double their coolant concentration trying to fix a surface finish problem, only to make it worse. If your wire starts “skating” across the workpiece, check concentration before blaming the wire.
The “Cold Cutting” Paradox: What the Temperature Numbers Actually Mean
The term “cold cutting” confuses a lot of people — and it’s one of the most misunderstood aspects of the diamond wire cutting process. It’s accurate in the macro sense — the workpiece stays near room temperature — but the contact points are intensely hot.
Where the heat comes from
Heat inside the kerf comes from three physical interactions, and knowing the split helps you troubleshoot:
Frictional heat (roughly 40-60% of total): Generated by the diamond particles rubbing against the kerf walls and by chips grinding against each other. This is the component you control most directly through coolant flow and wire speed.
Fracture energy (roughly 30-40%): The mechanical energy required to break atomic bonds in the material. Harder materials with higher fracture toughness generate more heat per unit of material removed — which is part of why SiC requires slower feed rates than glass, as documented in fracture mechanics research per ASTM E399 for plane-strain fracture toughness.
Wire bending loss (roughly 5-15%): Internal friction of the steel core flexing rapidly around guide wheels. This is a fixed overhead that you can’t eliminate, but you can minimize it by keeping your guide wheel diameters properly sized for the wire. (For alignment details, see our machine alignment and installation guide.)
Why the “cold” state matters
By evacuating heat before it penetrates the bulk material, the diamond wire cutting process ensures that the metallurgical structure of semiconductor wafers isn’t altered, that residual thermal stress isn’t introduced into brittle ceramics, and that sub-surface damage stays minimal. This is why diamond wire cutting can achieve what traditional abrasive grinding can’t on thermally sensitive substrates — grinding generates localized temperatures well over 1,000°C that spread deep into the workpiece.
When the thermal balance breaks
If coolant flow drops or feed rate is too aggressive, the localized temperature spikes beyond safe parameters. Two things happen: the steel core wire starts to anneal and lose tensile strength, and the diamond particles begin to graphitize (revert from diamond to graphite crystal structure). Both are irreversible.
We saw this on a production line cutting SiC — the coolant pump had partially clogged and flow dropped from 60 L/min to about 30 L/min without anyone noticing. Wire life dropped from 5 days to 2 days before someone caught it. The wire wasn’t defective; it was being thermally destroyed. Understanding the thermal dynamics of the diamond wire cutting process would have prevented that entire batch of scrap.
Speed vs. Quality vs. Tool Life: The Trade-offs You Can’t Avoid
In practice, you cannot maximize cutting speed, surface finish, and wire lifespan simultaneously. Mastering the diamond wire cutting process means accepting that every operating point is a compromise — and knowing which corner of the triangle to favor for your specific material.
The three corners
Maximum efficiency (highest material removal rate): Push feed rate and wire speed to their limits. You’ll output parts faster, but surface roughness increases and wire life drops sharply. This makes sense for graphite blocks where Ra <10μm is acceptable and wire lasts ~7 days even at aggressive parameters.
Maximum quality (lowest surface roughness): Drop feed rate to the bottom of the range. You’ll get a sanding-like finish with minimal wire marks — critical for semiconductor wafers and optical components where sub-surface damage causes downstream failures. But throughput drops, and cost per part climbs.
Maximum wire life: Run the machine conservatively on every parameter. A single loop can last 5-7 days under 8-hour shifts on cooperative materials. But your overall yield per shift drops accordingly.
Finding the sweet spot by material
Every material has a different optimum:
Graphite is forgiving. We run our SV60-60 at 50-100 mm/min feed, 40-70 m/s wire speed, dry cutting, and get flat surfaces with no edge chipping. Wire lasts about 7 days at 8 hours/day. The economics clearly favor pushing speed here.
Optical glass demands patience. On our SG20 cutting BK7, we run 2-10 mm/min feed, 30-60 m/s wire speed, with white mineral oil coolant. Surface quality is the priority — no wire marks, no visible cracks. Wire life is about 5 days.
Sapphire and SiC are the hardest trade-off. These substrates are expensive, so every rejected wafer costs real money. We run conservative wire speeds (35-55 m/s for sapphire), tight tension, and prioritize surface integrity over throughput.
The process of finding your specific optimum should be data-driven. Track three metrics: material removal rate (MRR), surface roughness (Ra), and wire lifespan. If Ra exceeds your target, reduce feed rate first and check coolant flow. If wire life drops below 3-4 days, you’re likely operating beyond the thermal safe zone. (For a systematic approach to parameter optimization, see our surface quality optimization guide.)
Frequently Asked Questions About the Diamond Wire Cutting Process
Why doesn’t the wire last forever if diamond is the hardest material?
Hardness isn’t the same as durability. The diamond particles take repetitive micro-impacts at 5-10 GPa, thousands of times per second. Over time, the sharp edges round off, the nickel bond weakens, and individual particles fatigue and detach. That’s normal abrasive wear, not a defect. On our loops, we typically see 5-7 days of life at 8 hours/day for most materials — and significantly longer on softer substrates like graphite.
Is diamond wire cutting truly “cold”?
Relative to grinding, yes. The diamond-substrate contact points hit 400-800°C momentarily, but the wire moves at up to 85 m/s and the coolant evacuates heat almost instantly. Less than 100 microns from the cut, the material is at room temperature. The bulk workpiece doesn’t undergo thermal expansion, which prevents internal stress and metallurgical changes. We’ve verified this with embedded thermocouple measurements on silicon wafers — peak temperature 3mm from the kerf never exceeded 28°C.
Why do some materials cut fast while others need crawling feed rates?
It comes down to brittleness and thermal conductivity. Highly brittle materials like glass and silicon fracture easily under micro-impact — material comes away quickly. Materials with poor thermal conductivity (like SiC) trap heat at the contact point, so you have to slow down to keep the thermal balance. Graphite is the best of both worlds: brittle and thermally conductive, which is why you can push 50-100 mm/min feed rates on it.
My machine has automatic tensioning — can’t I just increase tension to cut faster?
No. Tension controls the wire’s rigidity, not its cutting power. The automatic tensioning system keeps the wire straight and maintains ±0.01mm positioning accuracy. Over-tensioning doesn’t increase the abrasive shear force — it only accelerates the mechanical fatigue of the steel core. If you need to cut faster, increase wire speed (within the safe range for your material) or optimize coolant flow before touching tension.
How do I know if my parameters are optimized?
Three indicators: surface roughness (Ra value), wire lifespan, and material removal rate (MRR). If Ra exceeds your target, reduce feed rate and verify coolant flow. If wire life drops below 3-4 days for your material, you’re pushing too hard thermally. If MRR is lower than expected, check whether the wire has glazed — which usually means either protrusion height has worn down or coolant concentration is too high. Start with the parameter ranges from the tables above and adjust based on empirical results.
Explore our comprehensive overview of diamond wire cutting fundamentals.