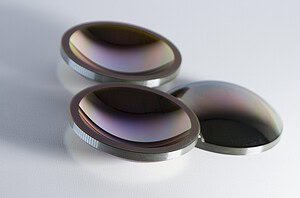
Most engineers blame the diamond abrasive when a wire loop cuts poorly. We did too — until we burned through $30K in premium diamond wire on a sapphire wafer line and still had 15% yield loss from wavy cuts and micro-chipping.
The problem wasn’t the diamonds. It was the diamond wire loop structure design: wrong tension profile, a poorly engineered joint with uneven mass distribution, and grit spacing that looked fine on the spec sheet but clogged within 30 minutes of cutting. Once we fixed the structural parameters — geometry, tension distribution, and joint design — our yield jumped to 94% without changing the abrasive grade.
This article breaks down the three structural factors that actually determine cutting stability in diamond wire loop systems, with specific numbers and failure modes we’ve seen across silicon, sapphire, and ceramic cutting lines.

What Makes Diamond Wire Loop Structure Design Critical for Cut Quality?
Wire diameter: it’s a kerf loss decision
The core wire diameter directly sets your kerf width — and therefore how much expensive substrate you’re grinding into dust.
The range spans from 0.3mm up to 3.0mm, but most production falls into two buckets:
0.3mm – 0.8mm: Standard for semiconductor wafer slicing where every micron of kerf loss translates to real money. A 0.3mm wire on monocrystalline silicon saves roughly 40% material versus a 0.8mm wire. The catch: anything below 0.5mm needs tensile strength above 3,500 MPa or it snaps under normal feed pressure — this aligns with the tensile requirements outlined in ASTM E8 standard for metallic materials testing. We had a batch of 0.35mm wire from a secondary supplier that was spec’d at 3,200 MPa — lost 4 wires in one shift before we pulled it.
1.0mm – 3.0mm: For structural ceramics, graphite, and thick-section profiling where kerf loss matters less than throughput and wire survival.
Grit spacing: the clogging problem nobody talks about
For electroplated loops, grit spacing determines whether your cut runs clean or stalls from thermal buildup. (The electroplating process itself plays a major role here — we explain how plating parameters control grit distribution in our manufacturing process overview.) This is where most procurement mistakes happen — denser grit looks better on paper (“more diamonds = better cutting,” right?), but in practice:
Too dense → swarf can’t evacuate → coolant channels disappear → thermal buildup → workpiece micro-cracking. We’ve measured surface temperatures spiking from 45°C to over 120°C in under 10 seconds when grit spacing drops below the critical clearance threshold for a given substrate.
Too sparse → individual grains take excessive load → accelerated pull-out → wire goes bald in patches. You’ll see this as intermittent “chattering” in the cut surface.
The sweet spot depends entirely on what you’re cutting and your coolant flow rate. For silicon with water-based coolant at 2-3 L/min, medium-density spacing (roughly 40-60% coverage) has consistently given us the best balance. Getting this right is fundamental to diamond wire loop structure design — and it’s the parameter most often overlooked during wire selection.
Round wire loop vs. band saw: why cross-section geometry matters
Diamond wire loops use a round cross-section — and that’s not arbitrary. Round wire tracks smoothly over pulleys, distributes wear evenly around the circumference, and cuts effectively regardless of approach angle. There’s no orientation to manage, no twist to fight.
The closest structural comparison is the diamond band saw, which uses a flat, ribbon-like blade. Band saws can remove material aggressively in one direction thanks to the wider cutting edge, but the trade-offs are significant: wider kerf (typically 1.5-3mm vs. 0.35-1.0mm for wire loops), higher material waste, and coarser surface finish. Band saws also can’t follow tight radii or perform contour cuts — the blade’s rigidity limits you to straight or gently curved profiles.
For hard and brittle materials like sapphire, silicon, and advanced ceramics, the round wire loop wins on every metric that matters: narrower kerf, lower cutting force, better surface integrity, and the ability to cut complex geometries. Band saws still have their place for rough-cutting large blocks of softer materials where kerf loss is acceptable and throughput is the priority — but for precision work, there’s no contest.
Grit protrusion height: the exposed-diamond advantage
This is where endless diamond wire loops differ fundamentally from traditional spool-based diamond wire. On conventional reel-to-reel wire, the diamond particles are embedded inside the nickel plating — mostly encapsulated, with only the tips poking out. The plating has to grip each particle tightly because the wire is manufactured in kilometers-long runs at high speed.
Endless loop wire uses a different approach: the diamonds are electroplated onto the surface with the particles directly exposed — what we call “bare grit” or open coating. The polyhedral diamond crystals sit on top of the nickel layer with sharp edges and faces fully accessible to the workpiece. The result is a fundamentally more aggressive cut from the first contact.
The critical parameter here is protrusion height — how far the diamond crystals extend above the nickel bond surface. This is the functional equivalent of “tooth height” on a saw blade.
Too low → the diamonds can’t bite into the workpiece → the wire slides instead of cuts (“glazing”) → you increase feed force → the wire deflects and wanders.
Too high → insufficient mechanical anchoring → the diamonds pull out under cutting load → you get rapid grit loss and premature wire failure.
We target protrusion at roughly 30-50% of the diamond particle diameter. For a 40μm diamond, that means 12-20μm of exposed crystal above the bond line. This leaves enough nickel grip to hold the particle through thousands of cutting cycles while keeping enough cutting edge exposed for efficient material removal. Getting this balance right is one of the less obvious aspects of diamond wire loop structure design — it doesn’t show up on a typical spec sheet, but it determines whether the wire cuts aggressively from hour one or needs a “break-in” period.
Application example
One configuration we’ve had good results with: 1.27mm diameter, medium-density electroplated grit, cutting dense silicon ingots and alumina ceramics. The 1.27mm core gives enough stiffness to resist deflection at standard feed rates (we typically run 2-10 mm/min on alumina), and the grit spacing leaves adequate channels for water-based coolant to flush silica dust. We ran this configuration for 6 months on a production line — average wire life was 180 hours before grit wear required replacement.
Why Does Tension Distribution Matter More Than You Think?
Even if your wire geometry is perfect, bad tension kills the cut. In any diamond wire loop structure design, tension distribution is the single most common root cause of “unexplained” surface finish problems we’ve investigated. (We cover the fatigue stress and lifespan implications of tension variance in more detail in our tension distribution and fatigue analysis.)
How wire tension works
The loop runs over drive and guide pulleys at speeds typically above 40 m/s — our machines can push up to 85 m/s on some configurations. Tension keeps the cutting zone rigid — it’s what prevents the wire from bowing away from the workpiece when it hits resistance. (Pulley alignment and speed stability also play a critical role — we break that down in vibration and alignment control in loop systems.)
Think of it like a guitar string: uniform tension = clean vibration mode = straight cut. Non-uniform tension = the wire wobbles laterally = your kerf wanders.

What happens when tension is uneven
We’ve debugged enough cutting lines to categorize the failure modes:
Wire wander (snaking): The wire bows side-to-side, producing wavy cuts. On wafer slicing, this shows up as TTV (total thickness variation) exceeding spec. We had one line producing 300μm wafers with ±25μm TTV — turned out to be a 7% tension variance that was invisible on static measurement but showed up immediately under cutting load.
Premature breakage: Localized tension spikes exceed the wire’s yield strength. The wire doesn’t wear out — it snaps. If your wires consistently break at roughly the same hour mark (say, 50 hours), that’s fatigue at a stress concentration point, not normal wear.
Patchy wear: Some sections of the loop drag instead of cut, stripping the electroplated abrasives unevenly. You’ll see shiny bare-metal patches alternating with still-coated sections. This is a tension problem, not a plating quality problem.
What do the numbers look like?
| Metric | Good Wire Loop | Cheap Wire Loop | Why It Matters |
|---|---|---|---|
| Tension variance (dynamic) | < 2% | 5% – 10% | >3% causes visible wire wander on wafers |
| Vibration amplitude | < 0.05 mm | > 0.15 mm | Directly correlates with kerf tracking error |
| Tensile failure rate | < 0.1% per 100 hrs | > 2.0% per 100 hrs | Each break = 30-60 min downtime + potential workpiece loss |
The testing method matters too. Static tension measurement (pulling the wire on a bench) doesn’t catch dynamic issues. The wire needs to be tested at operating speed on a rotating rig with digital tension monitoring — we cover calibration procedures in our wire tension calibration guide. If your supplier can’t provide dynamic tension data, that’s a red flag.
How Does the Joint Affect Loop Life?
The joint is where the two ends of the wire connect to form the closed loop. In diamond wire loop structure design, this is the most structurally critical point — and it’s where most catastrophic failures originate if the joining technology isn’t up to the task.
The balance problem
At 40+ m/s, any mass or stiffness variation at the joint acts like a speed bump. Every time the joint section passes through the cut zone, it creates a micro-impact. On brittle substrates, these impacts show up as periodic marks on the cut surface — evenly spaced lines that correspond exactly to the loop circumference.
A properly engineered joint maintains the same mass per unit length and flexibility as the rest of the wire. You shouldn’t be able to feel the joint by running your finger along the wire (yes, we’ve actually done this as a quick check on incoming inspection). If there’s a noticeable bump or stiff spot, the joining technology has failed its most basic requirement.
The joining method matters more than most engineers realize. A joint that introduces heat — even briefly — changes the metallurgy of the core wire: altered temper, reduced spring properties, accelerated fatigue. We tracked failure data across hundreds of loops in our early development, and the joint was the failure origin in over 90% of premature breakage cases. That’s what pushed us to develop our own proprietary cold-joining technology, which eliminates heat input entirely. The result is a joint zone with no metallurgical change, no localized weak point, and fatigue life that’s roughly 3x longer than conventional welded loops on the same machine and application. (For details on joint methods and how different approaches compare, see our guide to joint methods in endless diamond wire loops.)
What to look for when evaluating joint quality
The industry benchmark: a joint should retain at least 85-90% of the base wire’s tensile breaking load. For a 1.0mm wire rated at 1,000N, expect the joint to hold 850-900N minimum. Anything below 80% is grounds for rejecting the batch.
For incoming inspection, two methods give you the clearest picture:
Destructive pull testing: Sample 3-5 loops per batch, test to failure. Record the break force and note whether it broke at the joint or in the base wire. If it consistently breaks at the joint, that’s normal — the question is the margin.
Dimensional and visual inspection: Digital microscopy at 50-100x magnification to check joint uniformity. The outer diameter at the joint should be within 5% of the wire’s nominal diameter — a joint that’s noticeably thicker than the base wire will create tracking problems at high speed. This follows similar dimensional tolerance principles described in ISO 17636 radiographic testing guidelines for joint inspection. (For details on how we run fatigue testing and build lifespan curves, see testing and service life of diamond wire loops.)
How to Match Diamond Wire Loop Structure Design to Your Application
There’s no universal diamond wire. Here’s what we’ve learned about matching specs to substrates. (If you’re still evaluating whether to switch from traditional linear wire to endless loops in the first place, our loop vs traditional wire performance comparison covers the cost and maintenance trade-offs.)
Highly abrasive materials (graphite, green ceramics): Wide grit spacing is critical — these materials generate massive amounts of fine dust. Pair with a wear-resistant nickel bond. We had a graphite cutting line running on our SV60-60 chew through standard wire in 40 hours; switching to a high-hardness bond formula pushed life to 120 hours.
Ultra-hard, brittle materials (sapphire, SiC): Smaller diameter wire (0.5-0.65mm for sapphire) with dense fine grit. Tension control is non-negotiable — even 3% tension variance causes micro-chipping at cut entry/exit points. Budget extra for pre-tensioned, stress-relieved wire cores.
Silicon wafer slicing: This is where kerf loss optimization matters most. Go as thin as your machine can reliably tension (typically 0.3-0.5mm for modern multi-wire saws). Medium grit density with water-based coolant at sufficient flow rate.
Common Failure Modes and What to Do About Them
Wire snaps consistently around 50 hours:
This is fatigue failure at the joint. Check two things: (1) is the joint dimensionally uniform? A joint with uneven mass distribution concentrates stress and initiates cracking — this is common with poorly executed welds or low-quality mechanical joints. (2) Are your pulley diameters large enough for the wire’s minimum bending radius? We’ve seen machines with undersized guide pulleys that killed wire life by 60%. For a more complete diagnostic checklist, see our troubleshooting guide.
Cut surface shows periodic “steps” or directional marks:
Classic tension distribution problem. The wire is snaking. Upgrading to pre-tensioned, stress-relieved cores typically eliminates this. Also check your machine’s tension control system — worn bearings on the tensioning arm can introduce 5-10% variance that wasn’t there when the machine was new.
Wire “glazes” and stops cutting after 20-30 minutes:
The grit protrusion height is too low — the exposed diamonds have worn flush with the nickel bond, or the plating was too thick to begin with. This can be a wire quality issue, but first check whether your coolant concentration is too high — excessive lubricant can coat the exposed diamond faces and replicate glazing symptoms even when protrusion is adequate.

How We Control These Parameters in Production
The structural factors above — geometry, tension, joint quality — aren’t just theoretical. They’re the exact diamond wire loop structure design parameters we monitor on every production batch.
Tension testing: Every loop runs through a dynamic tension rig at operating speed before shipping. We reject anything above 2% variance. Static bench testing alone doesn’t catch the issues that show up at 40+ m/s, so we invested in closed-loop digital monitoring three years ago. It added cost to our QC process, but customer wire-break complaints dropped by over 80%.
Joint quality control: Every joint is dimensionally verified to ensure diameter stays within 5% of the base wire, and every batch goes through destructive pull testing. We publish the sample size, mean, and standard deviation on the test report. If a joint doesn’t hit 85% of base wire tensile strength, the loop gets scrapped.
Grit spacing and protrusion control: Plating density and diamond protrusion height are monitored in-line with automated optical inspection. We maintain spacing within ±5% of target across the full loop length, and verify protrusion height stays within the 30-50% window relative to particle size. This consistency is what prevents the “hot spots” and “bald patches” that cause intermittent cutting problems — and ensures the wire cuts aggressively from the first contact without a break-in period.
If you’re dealing with any of the failure modes described in this article — wire wander, premature breakage, glazing — feel free to send us your current wire specs and cutting parameters. We’ve helped dozens of cutting lines diagnose whether the issue is the wire, the machine setup, or both.
That distinction matters. About 40% of the “wire quality” complaints we investigate turn out to be machine-side problems — worn pulley bearings, insufficient coolant flow, or tensioning systems that have drifted out of calibration. We’d rather help you fix the real problem than sell you wire you don’t need.
Learn more about our diamond loop engineering.
Related Diamond Wire Loop Resource
For the complete engineering overview, see our diamond wire loops main guide.