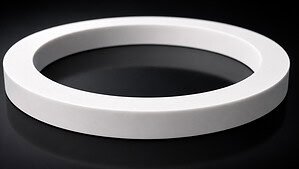
Bei Ihrem Schnitt ist etwas schiefgelaufen. Die Kanten sind abgesplittert, die Oberfläche ist grau, die Dicke variiert über den Schnitt hinweg, oder der Draht ist mitten im Schnitt gerissen und Sie haben jetzt einen $50 SmCo-Rohling mit einer Rille darin. Bevor Sie etwas verändern, lesen Sie diese Anleitung zur Fehlerbehebung beim Schneiden von Magneten – denn die häufigste Korrektur, die wir bei Bedienern sehen, ist die Anpassung des falschen Parameters.
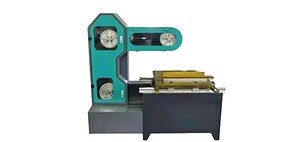
Wir haben jeden Schnittfehler katalogisiert, auf den wir bei Tausenden von NdFeB, Ferritund SmCo Schnittaufträgen auf unserer Endlos-Diamant-Seilsägen. gestoßen sind. Die Probleme lassen sich in fünf Kategorien einteilen: Kantendefekte, Oberflächenfehler, Maßfehler, Drahtprobleme und Nachschnittfehler. Jedes davon hat eine spezifische Ursache – und normalerweise eine spezifische Lösung. Diese Aufschlüsselung zur Fehlerbehebung beim Schneiden von Magneten deckt sie alle ab.

Kantensplitterung – Der häufigste Defekt beim Schneiden von Magneten
Null Duktilität ist das Kernproblem. Gesinterte Magnete verhalten sich unter Belastung wie Keramik – wie in der Bruchmechanikforschung zum Schneiden von NdFeB mit Diamantdraht beschrieben, geht das Material von duktilem Mikroschneiden zu sprödem Bruch über, wenn die Schnittkraft zunimmt. Kantensplitterung ist das, was spröder Bruch im Makromaßstab aussieht.
Warum tritt die Splitterung nur auf einer Seite auf?
Wenn die Eintrittsseite des Schnitts sauber ist, die Austrittsseite aber abgesplittert ist, ist die Ursache mechanisch. Wenn sich der Draht dem unteren Rand des Werkstücks nähert, wird die verbleibende Materialbrücke dünner, bis sie die Schnittlast nicht mehr tragen kann. Anstatt geschnitten zu werden, bricht sie – und erzeugt einen Splitter.
Fix: Reduzieren Sie die Vorschubgeschwindigkeit für die letzten 2–3 mm des Schnitts. Auf unseren Maschinen programmieren wir ein zweistufiges Profil: normale Vorschubgeschwindigkeit für den Großteil, dann eine 50%-Reduzierung für die Austrittszone. Diese einzelne Anpassung eliminiert die Splitterung auf der Austrittsseite in 80% der Fälle.
Wenn die Reduzierung der Vorschubgeschwindigkeit nicht hilft, fügen Sie eine Opfer-Trägerplatte hinzu, die mit Wachs oder Klebstoff auf der Austrittsseite des Werkstücks befestigt ist. Das Trägermaterial stützt den letzten Millimeter des Schnitts und verhindert so den Bruch. Graphit oder Aluminium funktionieren beide.
Warum tritt die Splitterung auf beiden Seiten auf?
Bilaterale Splitterung deutet auf eine übermäßige Schnittkraft über den gesamten Schnitt hin – nicht nur am Austritt. Der Diamantdraht übt mehr seitliche Kraft aus, als das Material aufnehmen kann, ohne an den Kanten zu brechen.
Beheben (in Reihenfolge der Auswirkung):
- Reduzieren Sie die Vorschubgeschwindigkeit um 20–30%. Die Vorschubgeschwindigkeit ist der dominierende Faktor, der die Schneidkraft pro Korn steuert.
- Überprüfen Sie die Drahtspannung. Eine Spannung von über 130 N bei Ferrit oder über 120 N bei SmCo ist für die meisten Querschnitte zu hoch. Reduzieren Sie in 10-N-Schritten.
- Überprüfen Sie den Draht. Abgenutzter Draht mit fehlenden oder abgeflachten Diamantkörnern erfordert mehr Kraft zum Schneiden, was zu mehr Absplitterungen führt. Ersetzen Sie den Draht.
Warum entstehen Absplitterungen zufällig und nicht an den Kanten?
Zufällige Absplitterungen – Fragmente, die von der flachen Oberfläche und nicht von der Kante fehlen – deuten fast immer auf interne Materialfehler hin. Lufteinschlüsse, Einschlüsse oder Mikrorisse aus dem Sinterprozess schaffen Schwachstellen, die unter Schneidbelastung versagen.
Dies ist kein Schneidproblem. Es ist ein Qualitätsproblem des Materials. Wenn zufällige Absplitterungen bei mehreren Rohlingen aus derselben Charge hartnäckig auftreten, sprechen Sie mit Ihrem Magnetlieferanten. Nach unserer Erfahrung weisen etwa 5% der gesinterten NdFeB-Rohlinge von kleineren Lieferanten interne Defekte auf, die unabhängig von den Schneidparametern zu zufälligen Absplitterungen führen.
Oberflächenfehler – Was stimmt mit meiner Schnittfläche nicht?
Warum ist die Schnittfläche grau oder verfärbt?
Bei NdFeB: Dies ist Oxidation. Die Nd-reiche Korngrenzenphase reagierte mit Feuchtigkeit – entweder durch wasserbasiertes Kühlmittel, Luftfeuchtigkeit in der Werkstatt oder Wasserverunreinigung in Ihrem Ölkühlmittelsystem.
Fix: Wechseln Sie zu auf Öl basierendes Kühlmittel wenn Sie Wasser verwenden. Wenn Sie bereits Öl verwenden, prüfen Sie auf Wasserverunreinigung: Kondensation im Tank (häufig in feuchten Umgebungen), Restwasser von einem früheren Ferritschneidvorgang oder ein Leck in der Kühlmittelleitung. Ablassen, spülen und mit frischem Öl auffüllen.
Überprüfen Sie auch die Schutzzeit. Wenn geschnittene Teile vor dem Ölen oder Verpacken länger als 30 Minuten der Werkstattluft ausgesetzt sind, beginnt die Oxidation. Beschleunigen Sie Ihre Nachbearbeitung.
Bei Ferrit oder SmCo: Graue Verfärbungen sind ungewöhnlich und wahrscheinlich keine Oxidation. Es handelt sich eher um Schneidrückstände oder Kühlmittelverfärbungen. Mit Isopropylalkohol reinigen. Wenn sich die Verfärbung nicht abwaschen lässt, handelt es sich möglicherweise um unterflächliche Schäden durch übermäßige Schneidkraft – reduzieren Sie die Vorschubgeschwindigkeit.
Warum nimmt die Oberflächenrauheit plötzlich zu?
Letzte Woche hatten Sie Ra 0,4 µm, jetzt ergeben dieselben Parameter Ra 1,0+ µm. Drei wahrscheinliche Ursachen:
Drahtverschleiß. Diamantkörner flachen ab und lösen sich im Laufe der Lebensdauer des Drahtes. Wenn sich die Schneidfläche verschlechtert, verlagert sich der Abtragmechanismus von sauberem Mikroschneiden zu stumpfem Pflügen – was die Oberfläche eher reißt als schneidet. Verfolgen Sie die kumulativen Schnittmeter und korrelieren Sie sie mit Ra-Messungen, um Ihre Drahtwechselgrenze festzulegen. Bei NdFeB sehen wir typischerweise eine spürbare Zunahme der Rauheit nach 40–50 Stunden kontinuierlichen Schneidens mit 0,35 mm galvanisch beschichtetem Diamantdraht.
Kühlmittelkontamination. Im Kühlmittel angesammelte Späne werden durch die Schnittzone zurückgeführt und zerkratzen die Schnittfläche. Überprüfen Sie die Klarheit des Kühlmittels. Wenn es merklich dunkler als frisches Fluid ist, wechseln Sie es aus. Überprüfen Sie den Filterzustand – ein verstopfter Filter bedeutet, dass ungefiltertes Kühlmittel direkt in die Schnittzone gelangt.
Verschleiß der Führungsradnut. Verschleißte Nuten ermöglichen es dem Draht, sich während des Schneidens seitlich zu oszillieren, wodurch eine periodische Welligkeit entsteht, die sich auf die Oberflächenrauheit überlagert. Das verräterische Zeichen: regelmäßige Gratmuster in Abständen von 0,5–2 mm auf der Schnittfläche. Inspizieren Sie die Nuten unter Vergrößerung. Wenn das V-Nutprofil abgerundet oder verbreitert ist, ersetzen Sie das Führungsrad oder bearbeiten Sie die Nut neu.
Warum gibt es periodische Linien auf der Schnittfläche?
Regelmäßige, parallele Linien oder Grate, die gleichmäßig über die Schnittfläche verteilt sind – das ist Welligkeit, keine Rauheit. Die Ursache ist fast immer eine seitliche Drahtvibration.
Checkliste der Grundursachen:
Seitliche Drahtvibrationen entstehen aus drei Quellen: Verschleiß der Führungsradnut (am häufigsten), unzureichende Drahtspannung (Draht hängt durch und oszilliert) oder externe Vibrationen, die über den Maschinenfußboden übertragen werden. Prüfen Sie in dieser Reihenfolge.
Wir hatten einen Fall, in dem die Welligkeit intermittierend auftrat – einige Schnitte waren sauber, andere hatten ausgeprägte Grate. Es stellte sich heraus, dass die HLK-Anlage des Gebäudes ein- und ausgeschaltet wurde und wenn der Kompressor lief, übertrug er Vibrationen durch den Betonboden in die Maschine. Zusätzliche Vibrationsisolationspads unter den Maschinenfüßen angebracht. Problem gelöst.

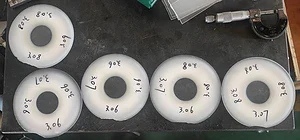
Maßfehler – Warum sind meine Scheiben falsch?
Warum werden Scheiben zunehmend dünner oder dicker?
Wenn die ersten paar Scheiben eines Blocks innerhalb der Toleranz liegen, die späteren Scheiben aber abdriften, ist die Ursache eine kumulative Drahtablenkung oder ein Verrutschen des Werkstücks.
Drahtablenkung: Da der Draht während eines Mehrfachschnittlaufs verschleißt, verliert er an Diamantbeschichtungsdicke. Der effektive Schneiddurchmesser verringert sich geringfügig, was die Schnittfugenbreite verändert. Jeder aufeinanderfolgende Schnitt kann geringfügig dicker sein (da weniger Material entfernt wird). Die Lösung ist einfach: Ersetzen Sie den Draht in einem konsistenten Intervall, anstatt ihn bis zur sichtbaren Abnutzung zu verwenden.
Werkstückverschiebung: Wenn das Werkstück nicht richtig eingespannt ist, drückt die Schnittkraft es allmählich weg. Jeder Schnitt verschiebt das Werkstück um einige Mikrometer weiter und erzeugt so eine fortschreitende Dickenabweichung. Spannen Sie das Werkstück zwischen den Schnitten neu ein oder kleben Sie es neu, wenn die Abweichung Ihre Toleranz überschreitet.
Warum ist ein Schnitt auf einer Seite dicker als auf der anderen?
Konische Schnitte – oben dicker, unten dünner oder umgekehrt – deuten auf eine Drahtablenkung während des Schnitts hin. Der Draht biegt sich unter der Schnittkraft, und das Ausmaß der Biegung variiert mit der Tiefe.
Fix: Reduzieren Sie die Vorschubgeschwindigkeit. Die Drahtbiegung ist direkt proportional zur Schnittkraft, und die Vorschubgeschwindigkeit ist der primäre Treiber der Vorschubkraft. Wenn die Reduzierung der Vorschubgeschwindigkeit die Konizität nicht vollständig beseitigt, erhöhen Sie die Drahtspannung in 10-N-Schritten – höhere Spannung reduziert die Biegungsamplitude. Überschreiten Sie jedoch nicht die empfohlene Obergrenze für Ihr Material (150 N für NdFeB, 130 N für Ferrit, 120 N für SmCo).
Überprüfen Sie auch die Querschnittsgröße des Werkstücks. Größere Querschnitte erzeugen mehr Drahtbiegung, da die ungestützte Drahtspanne länger ist. Für Blöcke über 40 mm sollten Sie die Vorschubgeschwindigkeit unabhängig vom Materialtyp auf 1,0 mm/min reduzieren.
Drahtprobleme – Bruch, Verschleiß und Nachführung
Warum reißt der Draht immer wieder?
Drahtbruch beim Schneiden von Magneten hat vier häufige Ursachen, in absteigender Reihenfolge der Häufigkeit:
1. Draht hat seine Lebensdauer überschritten. Die häufigste Ursache. Die Diamantbeschichtung verschleißt, der Stahlkern wird freigelegt, und der Kern kann die Schnittlast allein nicht tragen. Wie MDPI-Forschung zur Diamantdrahtsägebearbeitung von NdFeB bestätigt, ist der Drahtzustand ein Hauptfaktor für die Verschlechterung der Oberflächenqualität. Verfolgen Sie die kumulativen Schnittstunden und ersetzen Sie proaktiv. Für NdFeB empfehlen wir den Austausch nach 40–50 Stunden. Für SmCo ersetzen Sie früher nach 30–40 Stunden (die Kosten einer Drahtschleife sind vernachlässigbar im Vergleich zu einem ruinierten SmCo-Rohling).
2. Scharfe Werkstückecken. Wenn der Draht eine scharfe 90°-Ecke am Werkstück berührt, kann die Spannungskonzentration am Kontaktpunkt die Zugfestigkeit des Drahtes überschreiten. Fasen Sie die Werkstückkanten vor dem Schneiden mit einem Handschleifstein an oder drehen Sie das Werkstück so, dass der Draht auf eine ebene Fläche und nicht auf eine Ecke trifft.
3. Übermäßige Spannung. Eine Laufspannung von über 150 N bei einem 0,35-mm-Draht nähert sich der Streckgrenze des Stahlkerns. Wenn Sie die Spannung schrittweise erhöht haben, um andere Probleme (Drahtkrümmung, Oberflächenqualität) auszugleichen, sind Sie möglicherweise zu weit gegangen. Stellen Sie die Spannung auf den Basiswert (100 N) zurück und beheben Sie stattdessen die Ursache.
4. Kühlmittelmangel. Wenn das Kühlmittel die Schnittzone nicht erreicht – verstopfte Düse, leerer Tank, Pumpenausfall – läuft der Draht trocken. Ohne Schmierung steigen Reibung und Hitze sprunghaft an, und der Draht versagt. Dies ist im Nachhinein offensichtlich, aber während des Betriebs leicht zu übersehen. Überprüfen Sie den Kühlmittelfluss vor jedem Schnittlauf.
Warum springt der Draht von den Führungsrädern ab?
Drahtführungsfehler – der Draht rutscht aus den Rillen der Führungsräder – führen zu sofortigem Schneidversagen und möglichem Drahtbruch.
Fix: Überprüfen Sie die Rillen der Führungsräder. Abgenutzte oder mit Schmutz gefüllte Rillen können den Draht nicht in Position halten. Reinigen Sie die Rillen mit Druckluft und einer feinen Bürste. Wenn das Rillenprofil sichtbar abgenutzt ist (abgerundete Kanten, verbreiterter Kanal), ersetzen Sie das Führungsrad. Überprüfen Sie auch die Drahtspannung – eine zu geringe Spannung lässt den Draht wandern, insbesondere bei Richtungswechseln in Konturschneidanwendungen applications.
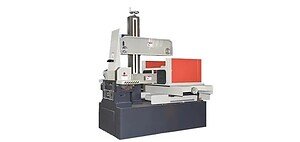
Auf unserem SG20-R Maschinen halten die Rillen der Führungsräder normalerweise 200–300 Schnittstunden, bevor sie ersetzt werden müssen. Verfolgen Sie die Betriebsstunden und inspizieren Sie regelmäßig.
Nach dem Schnitt aufgetretene Fehler – Fehlerbehebung beim Magnet-Schneiden nach dem Sägen
Warum reißen Teile Stunden nach dem Schneiden?
Verzögerte Rissbildung – Teile, die nach dem Schneiden perfekt aussehen, aber bei der Lagerung reißen – ist das frustrierendste Problem beim Magnet-Schneiden, da es unsichtbar ist, bis es zu spät ist.
Zwei Ursachen:
Eigenspannungen durch die Spannvorrichtung. Wenn die mechanische Klemmung während des Schneidens übermäßige Kraft ausgeübt hat, behält das Teil innere Spannungen. Sobald die Klemmkraft entfernt ist, verteilt sich die Spannung im Laufe der Zeit neu und überschreitet schließlich die Bruchfestigkeit an einem inneren Defekt. Dies ist besonders häufig bei Ferrit, das die geringste Bruchzähigkeit aller gängigen Magnetmaterialien aufweist.
Fix: Reduzieren Sie die Klemmkraft. Wechseln Sie bei dünnen Teilen (unter 5 mm) von mechanischer Klemmung zur Klebebefestigung. Lassen Sie 24 Stunden Spannungsrelaxation vor der Endkontrolle – wenn Teile aufgrund von Restspannung reißen, geschieht dies normalerweise innerhalb der ersten 12 Stunden.
Restspannung aus dem Sintern. Einige Rohlinge kommen mit inneren Spannungen aus dem Sinterofen aufgrund ungleichmäßiger Abkühlung. Der Schneidprozess löst diese Spannungen asymmetrisch, und die Umverteilung verursacht Stunden oder Tage später Risse. Dies ist ein Materialproblem, kein Schneidproblem – aber es ist gut zu wissen, damit Sie keine Zeit mit der Anpassung der Schneidparameter verschwenden.
Indikator: Wenn verzögerte Risse bei mehreren Rohlingen aus derselben Sintercharge auftreten, aber nicht bei anderen Chargen, ist der Sinterprozess die Ursache. Besprechen Sie dies mit Ihrem Magnetlieferanten.
Warum löst sich die Beschichtung nach dem Galvanisieren ab?
NdFeB-Teile wurden geschnitten, angefast, gereinigt und galvanisiert – aber die NiCuNi-Beschichtung blättert oder löst sich während des thermischen Zyklus oder bei Haftungstests ab.
Ursachen (in absteigender Wahrscheinlichkeit):
- Unzureichende Oberflächenreinigung. Ölbasierter Kühlschmierstoff, der in den Oberflächenmikroporen eingeschlossen war, wurde während der Ultraschallentfettung nicht vollständig entfernt. Restöl bildet eine schwache Grenzschicht unter der Beschichtung. Lösung: Verlängern Sie die Ultraschallreinigungszeit, erhöhen Sie die Badtemperatur auf 55–60 °C und fügen Sie einen zweiten Entfettungszyklus hinzu.
- Oberflächenoxidation vor dem Galvanisieren. Wenn gereinigte Teile zu lange vor dem Eintauchen in das Galvanikbad lagen, oxidierte die Oberfläche wieder. Die Oxidschicht verhindert die richtige Haftung der Nickel-Strike-Schicht. Lösung: Minimieren Sie die Zeit zwischen der Endreinigung und dem Galvanisieren – idealerweise unter 10 Minuten.
- Unterflurschäden durch Schneiden. Aggressive Schneidparameter können eine beschädigte Schicht von 10–30 μm Tiefe mit Mikrorissen und gelockerten Körnern erzeugen. Die Beschichtung haftet an dieser beschädigten Schicht, und wenn sich die Schicht unter Belastung verschlechtert, folgt die Beschichtung mit. Lösung: Reduzieren Sie die Vorschubgeschwindigkeit, um im sanften Schneidregime zu bleiben, oder fügen Sie einen leichten Schleifdurchgang hinzu, um die beschädigte Schicht vor dem Beschichten zu entfernen.
Magnet-Schneid-Fehlerbehebung Schnelle Referenz
| Symptom | Wahrscheinlichste Ursache | Erste zu versuchende Lösung |
|---|---|---|
| Abfallende Kanten | Drahtbruch am Austritt | Reduzieren Sie die Vorschubgeschwindigkeit für die letzten 2–3 mm |
| Abfallende Kanten auf beiden Seiten | Übermäßige Schneidkraft | Reduzieren Sie die Vorschubgeschwindigkeit um 20–30 % |
| Graue Oberfläche (NdFeB) | Kontakt mit Wasser/Feuchtigkeit | Wechseln Sie zu Ölkühlmittel; auf Verunreinigungen prüfen |
| Zunehmendes Ra im Laufe der Zeit | Drahtverschleiß oder verschmutztes Kühlmittel | Draht ersetzen; Kühlmittel wechseln |
| Periodische Rillen auf der Oberfläche | Verschleiß der Führungsradnut | Führungsräder inspizieren/ersetzen |
| Progressive Dickenabweichung | Drahtverschleiß oder Werkstückverschiebung | Draht ersetzen; neu spannen |
| Konische Scheiben | Drahtbiegung unter Last | Vorschubgeschwindigkeit reduzieren; Spannung leicht erhöhen |
| Drahtbruch | Überschrittenes Serviceleben | Betriebsstunden verfolgen; proaktiv ersetzen |
| Verzögerte Rissbildung | Spannungsdruck oder Sinterspannung | Klemmkraft reduzieren; auf Klebebefestigung umstellen |
| Beschichtungsablösung | Unzureichende Reinigung oder Oberflächenschäden | Ultraschallreinigung verlängern; Vorschubgeschwindigkeit reduzieren |
Diese Tabelle deckt etwa 90% der Magnet-Schneideprobleme ab, auf die wir stoßen. Bei den restlichen 10% ist die Ursache normalerweise umweltbedingt oder maschinenspezifisch – und hier kann ein kostenloser Probeschnitt mit dokumentierten Parametern helfen, die Variable zu isolieren.
Magnet-Schneide-Fehlerbehebung: Parameter vs. Maschinenzustand
Ein Muster, das wir immer wieder sehen: Ein Bediener stößt auf ein Schneideproblem und beginnt sofort, die Vorschubgeschwindigkeit, die Spannung und die Drahtgeschwindigkeit anzupassen – oft werden mehrere Änderungen gleichzeitig vorgenommen. Nach einem halben Tag des Ausprobierens ist das Problem immer noch da, weil es sich um ein Problem mit dem Maschinenzustand handelte und nicht um ein Parameterproblem.
Überprüfen Sie zuerst die Maschine, wenn:
Das Problem trat plötzlich bei einem Material und einer Geometrie auf, die Sie erfolgreich geschnitten haben. Parameter hören nicht plötzlich auf, bei demselben Material zu funktionieren. Etwas hat sich mechanisch geändert – Verschleiß des Führungsrades, Verstopfung des Kühlmittelstroms, lockeres Werkstück oder Vibrationen von einer externen Quelle.
Passen Sie die Parameter an, wenn:
Sie schneiden zum ersten Mal ein neues Material oder eine neue Geometrie und haben noch keine Basiseinstellungen festgelegt. Beginnen Sie mit den empfohlenen Bereichen aus unseren Materialführern (NdFeB, Ferrit, SmCo) und passen Sie jeweils eine Variable an. Ändern Sie niemals mehr als einen Parameter zwischen Probeschnitten – andernfalls können Sie nicht isolieren, welche Änderung die Verbesserung bewirkt oder die Situation verschlimmert hat.