A customer once asked us why two visually identical diamond wire loops — same diameter, same diamond grit size, same advertised tension rating — gave them wildly different cutting results. One ran 180 hours and produced mirror-finish cuts on optical glass. The other started glazing after 30 minutes and broke at the joint inside 50 hours. The answer was in the loop manufacturing process: core wire pretreatment, plating uniformity, and joint quality vary enormously between manufacturers, and the differences only show up under operating load.
The loop manufacturing process for endless diamond wire isn’t a single operation — it’s a sequence of around 15 controlled steps, from selecting the steel core through final dynamic testing. Every step has a specification window, and operating outside that window in any one step compromises the finished loop. This article walks through the major stages, the parameters that matter, and where most quality failures originate.

What Are the Stages of the Loop Manufacturing Process?
The complete sequence breaks down into four major stages:
- Core wire preparation — selecting and pretreating the steel core
- Electroplating process — depositing nickel matrix and embedding diamond grit
- Loop assembly — closing the wire into an endless ring
- Quality verification — dimensional, mechanical, and dynamic testing
Each stage compounds on the previous one. A defect introduced at the core preparation stage can’t be fixed by careful plating; a plating defect can’t be salvaged by a perfect joint. The loop manufacturing process has to be controlled end-to-end.
Core Wire Preparation: The Foundation Stage
Most quality variation between loop suppliers traces back to this stage. The core wire is a high-strength steel filament — typically 0.3-1.0mm diameter for precision applications — and its mechanical properties dictate the entire loop’s performance ceiling.
Steel selection and tensile requirements
The base material is high-carbon steel wire drawn to precise diameter tolerances. For loops below 0.5mm diameter, tensile strength must exceed 3,500 MPa or the wire snaps under normal feed pressure. We’ve seen budget loops using 3,200 MPa wire on thin diameters — they fail in under one shift on standard cutting loads. The tensile testing follows methods established in 금속 재료의 인장 시험에 대한 ASTM E8 규격, and any reputable wire supplier should be able to provide test certificates with the sample size and standard deviation.
Diameter tolerance also matters. Variation greater than ±2% across the wire length translates to tension variation under load — sections with smaller diameter stretch more under tension, creating localized stress concentrations. We specify ±1% diameter tolerance on incoming wire for this reason.
Surface preparation
Before plating, the wire surface needs three treatments:
Degreasing removes drawing lubricants and oxidation. Residual lubricant prevents nickel adhesion — you’ll get plating that looks fine visually but delaminates under cutting load. We use alkaline degreasing baths followed by deionized water rinse.
Acid pickling removes surface oxides and creates micro-roughness for mechanical bond. Too short a pickle and adhesion is poor; too long and you weaken the wire surface. The window is narrow.
Activation prepares the surface for the plating bath. Activation chemistry depends on the specific nickel formulation being deposited.
A common failure pattern: improperly degreased wire shows perfect plating immediately after manufacturing, then the diamond particles start shedding within the first few hours of cutting because the underlying nickel-to-steel bond is weak. By the time you see the symptom, the loop is unrecoverable.
Pre-tensioning and stress relief
For high-precision applications (semiconductor wafer slicing, optical glass), the wire core benefits from pre-tensioning before plating. This relieves residual stresses from the drawing process and reduces dynamic tension variation in service. (We cover the downstream effects of tension non-uniformity in our 응력 분포 및 피로 분석.)
Pre-tensioned, stress-relieved wire costs more — typically 15-20% premium over standard drawn wire — but it dramatically reduces wire wander on thin slicing applications. For sapphire and silicon wafer work, we consider it mandatory.
The Electroplating Process: Building the Cutting Layer
This is where the loop manufacturing process gets technically demanding. The electroplating process determines grit density, distribution uniformity, and most critically, diamond protrusion height — how far the diamond crystals extend above the nickel bond surface. (For the underlying physics of why this matters, see our diamond wire loop structure design guide.)
Nickel bath chemistry
The plating bath is typically a nickel sulfamate or nickel sulfate solution, with diamond particles suspended at controlled concentration. Bath parameters that need tight control:
| 매개변수 | 일반적인 범위 | 왜 중요한가 |
|---|---|---|
| Nickel concentration | 80-110 g/L | Controls deposition rate |
| pH | 3.5-4.5 | Affects bond ductility and grain structure |
| 온도 | 45-55°C | Influences plating uniformity |
| Current density | 2-8 A/dm² | Determines deposition rate and structure |
| Diamond concentration | Application-specific | Sets grit density on finished wire |
Drift in any of these parameters shifts the plating characteristics. Bath chemistry needs in-line monitoring and periodic rebalancing — typically every 4-8 hours of continuous operation, following nickel electroplating practices similar to those described in ASTM B689 standard for electroplated nickel coatings. Suppliers cutting corners on bath maintenance produce loops with batch-to-batch inconsistency in the loop manufacturing process.

Diamond grit selection
Particle size is the first decision. Standard ranges:
| Grit Size | 애플리케이션 |
|---|---|
| 25-40 μm | Fine surface finish, semiconductor wafers |
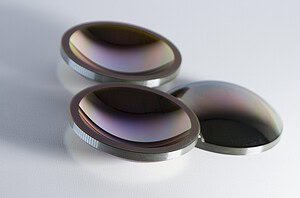
| 40-80 μm | General precision cutting, optical glass, ceramics |
| 80-150 μm | Aggressive removal, thicker materials |
| 150-300 μm | Heavy-duty cutting, large blocks |
Polyhedral diamond crystals with sharp edges are preferred for the exposed grit coating approach used in endless loops — the sharp edges remain accessible for cutting because the particles aren’t encapsulated in the plating, unlike traditional spool wire. (We discuss this fundamental difference in coating approach in our abrasive wire coating guide.)
Achieving proper protrusion height
The target is 30-50% of the diamond particle diameter exposed above the nickel bond. For a 40μm particle, that means 12-20μm of crystal protruding. This is the critical parameter that determines whether the wire cuts aggressively from hour one or needs a “break-in” period.
Three factors control protrusion height:
Plating thickness — too thick and the diamonds get buried (wire glazes); too thin and the diamonds pull out under load (rapid grit loss).
Diamond loading rate — how many particles attach per unit time during plating. Affects spacing between adjacent grits.
Bath agitation pattern — controls how diamond particles distribute across the wire circumference. Poor agitation produces “stripes” where one side of the wire has more grit than the other.
We monitor protrusion height with automated optical inspection in-line during the electroplating process. The acceptable window is tight: ±15% deviation from target is grounds for batch rework.
Grit spacing control
Beyond individual particle exposure, the spacing between grits matters. Too dense and swarf can’t evacuate, causing thermal buildup; too sparse and individual grains take excessive load, accelerating pull-out.
For most applications, we target 40-60% surface coverage with grit. The exact specification varies by:
- Workpiece material (graphite needs more open spacing for dust evacuation; silicon tolerates denser coverage)
- Wire speed (higher speeds need more open spacing for coolant access)
- Coolant flow rate available on the customer’s machine
We maintain spacing within ±5% of target across the full loop length using automated optical inspection.
Loop Assembly: Closing the Endless Ring
After plating and inspection, the linear wire becomes an endless loop through a joining operation. This stage determines a large fraction of the loop’s service life.
Why the joint matters so much
The joint is structurally the most critical point on the loop. At 40-85 m/s, any mass or stiffness variation at the joint creates micro-impacts every revolution. On brittle substrates, these show up as periodic surface marks. Worse, any local stress concentration at the joint becomes a fatigue initiation site that shortens the entire loop’s service life.
We learned early in our development that the joint method was the single biggest determinant of service life. Loops with poor joints failed at the joint in over 90% of cases — independently of how good the wire and plating were. (For a deeper comparison of joint methods used across the industry, including welding, crimping, and mechanical locking, see our 무한 다이아몬드 와이어 루프의 접합 방법 안내.)
Heat-induced damage at the joint
Conventional welding methods — laser welding, butt welding, brazing — all introduce heat into the wire. Even with tightly controlled laser welding, a heat-affected zone (HAZ) forms in the steel core, altering the local metallurgy. The temper changes, spring properties degrade, and the joint zone bends differently from the rest of the wire over guide pulleys. Under cyclic bending at thousands of cycles per hour, the metallurgically altered zone fatigues faster than the surrounding wire.
This is why we developed our own proprietary cold-joining technology that eliminates heat input entirely. The result is a joint with no metallurgical change in the core wire and fatigue life roughly 3x longer than welded joints on equivalent loops. We don’t disclose the specific process details — it’s our patented technology — but the performance outcome is what matters to customers.
Joint quality benchmarks
Regardless of joining method, the finished joint should meet two criteria:
인장 강도: At least 85-90% of the base wire’s breaking load. For a 1.0mm wire that breaks at 1,000N, the joint should hold 850-900N minimum.
Dimensional uniformity: Joint outer diameter within 5% of the base wire. Any noticeable thickening creates tracking problems and periodic surface marks at speed.
Both are verifiable through standard test methods. We perform destructive pull testing on samples from every batch and publish the results — sample size, mean, and standard deviation — on the test report shipped with the loops.
Quality Verification: What Happens Before the Loop Ships
The loop manufacturing process doesn’t end at assembly. Every loop goes through three verification stages before shipping.
Dimensional inspection
Diameter measurement at multiple points around the loop circumference. We check overall wire diameter, plating thickness uniformity, and joint zone geometry. Deviations beyond ±5% of nominal are grounds for rejection.
Static and dynamic mechanical testing
Static: Pull testing of representative samples from each batch. Verifies that joint strength meets the 85-90% benchmark.
Dynamic: Every loop runs through a rotating test rig at operating speed (40-80 m/s) with digital tension monitoring around the full loop circumference. We reject anything showing more than 2% dynamic tension variance. Static testing alone doesn’t catch the issues that show up under cutting load — a loop can pass static inspection and still fail dynamic testing because of subtle mass distribution non-uniformity.
This dynamic testing investment was significant — closed-loop digital monitoring isn’t cheap — but it dropped customer wire-break complaints by over 80%. (For details on accelerated lifespan testing, see our 다이아몬드 와이어 루프의 테스트 및 수명.)
Documentation and traceability
Following the traceability principles of ISO 9001 quality management systems, every shipped loop carries a batch identifier traceable back to:
- Core wire lot and tensile test certificate
- Plating bath conditions during deposition
- Grit batch and supplier
- Joint pull-test results
- Dynamic tension verification results
If a customer reports a field failure, we can pull the manufacturing record within minutes and determine whether the issue traces to a specific batch, a supplier change, or a process drift. This isn’t standard practice in the industry, but it should be — without traceability, you can’t isolate the root cause of intermittent quality issues.
Common Failure Modes Originating in the Loop Manufacturing Process
Most field failures we investigate trace back to one of four manufacturing-stage problems:
Premature joint failure: Wire snaps consistently around 50-80 hours. Indicates either a joint with insufficient tensile strength or a metallurgically damaged joint zone (HAZ from welding). Fix: switch to a joint method that doesn’t introduce heat.
Rapid grit loss / wire goes bald in patches: Diamonds detach from the nickel bond within the first 20-50 hours. Indicates poor surface preparation before plating — degreasing or activation was inadequate. Fix: verify supplier’s pretreatment process or switch suppliers.
Glazing after 20-30 minutes of cutting: Wire stops cutting and starts sliding across the workpiece. Usually means protrusion height was too low at manufacture, so the diamonds were buried in the bond from the start. Fix: verify protrusion height spec with supplier.
Wire wander / inconsistent TTV: Surface finish problems and total thickness variation that can’t be traced to machine setup. Often indicates dynamic tension non-uniformity from mass distribution problems in the loop — usually a poor joint or non-uniform plating distribution. Fix: require dynamic tension test data from supplier.
(For systematic diagnosis of these issues, see our 문제 해결 가이드.)

Frequently Asked Questions About the Loop Manufacturing Process
How long does it take to manufacture a custom diamond wire loop?
Standard production lead time on our loops is approximately 7 days from order. Custom configurations — non-standard wire diameter, special grit specifications, larger circumferences — can extend to 14-21 days depending on complexity. Guide wheels (a common companion order) take about 10 days.
Why do prices vary so much between suppliers for “similar” loops?
Almost all the cost difference traces to manufacturing process control. Pre-tensioned stress-relieved wire costs more than standard drawn wire. Tight bath chemistry control costs more than running plating to depletion. Dynamic tension testing costs more than static-only QC. Proprietary joining technology costs more than standard welding. A “cheap” loop is cheap because the supplier skipped one or more of these steps — and you’ll pay for it later in shorter wire life and quality complaints.
Can I get loops in non-standard configurations for my specific application?
Yes. We support custom diameters from 0.3mm to 3.0mm, custom grit sizes and densities, and loop circumferences scaled to the customer’s machine. Customization typically requires a sample run and validation cycle before full production — figure 30-45 days from initial spec to validated production loops for fully custom configurations.
What documentation should I expect with a quality loop?
At minimum: dimensional inspection report, tensile test data on the joint (with sample size and standard deviation), and a unique batch identifier for traceability. Premium suppliers also provide dynamic tension test results and grit distribution analysis. If a supplier ships loops without batch documentation, you have no way to isolate quality issues when they appear in service.
Read about our loop production standards.
관련 다이아몬드 와이어 루프 리소스
완벽한 제조 공정에 이 제조 공정이 어떻게 통합되는지 알아보세요. 다이아몬드 와이어 루프 기술.