Improving diamond wire cutting speed is not the same as increasing one machine setting. Productive cutting comes from balancing wire speed, tension, feed rate, cooling or debris removal, and abrasive condition. If one variable is pushed beyond the stable process window, the apparent speed gain may be lost through wire wear, surface defects, kerf variation or an interrupted cut.
This guide explains a practical adjustment sequence for continuous diamond wire cutting. It supports parameter development rather than prescribing one universal setting. For a deeper explanation of the three primary controls, see ワイヤー速度、張力、およびフィードレート.
Define Cutting Efficiency Before Adjusting the Machine
Cycle time is only one efficiency measure. For hard and brittle materials, a useful process must also meet the required kerf, straightness, surface condition, edge quality and wire-life target. A faster cut that creates chipping or requires more downstream grinding may increase total manufacturing time.
| Efficiency measure | What to record | なぜ重要なのか |
|---|---|---|
| Cutting time | Engaged cutting time and total handling time | Separates actual material removal from loading and setup losses |
| カット品質 | Kerf, straightness, flatness, edge chipping and surface condition | Confirms that a faster setting still meets acceptance criteria |
| Wire utilization | Number or length of cuts before replacement and reason for removal | Prevents short wire life from hiding behind a high instantaneous rate |
| Process stability | Load trend, vibration, temperature, sound and unplanned stops | Shows whether the setting is repeatable rather than temporarily fast |
| Total cost | Wire, coolant, cleaning, rework, scrap and operator time | Connects machine settings with production economics |
Four Linked Controls: Speed, Tension, Feed and Cooling
The four controls should be treated as a system. Change one variable at a time during testing, record the result, and return to the last stable condition if edge quality, load or tracking deteriorates.
| コントロール | Primary function | If too low | If too high |
|---|---|---|---|
| ワイヤースピード | Sets abrasive contact frequency and supports debris transport | Rubbing, low removal rate or unstable engagement | Heat, vibration, accelerated wear or higher wheel-system demand |
| ワイヤーテンション | Stabilizes the wire path through the workpiece | Deflection, wandering, bow or inconsistent kerf | Excess load on the loop, joint, wheels, bearings and fragile part |
| 送り速度 | Controls workpiece engagement and removal demand | Long cycle time and possible glazing or rubbing | Overload, chipping, wire bow, rough surface or stoppage |
| Cooling or debris removal | Removes heat and particles from the cutting zone | Loading, temperature rise, contamination or changing cut behavior | Excess flow can disturb a light workpiece or complicate handling |
Wet and dry processes require different debris-control strategies. Water or compatible coolant can carry particles and moderate temperature, while dry graphite or contamination-sensitive work may require open coating structures and effective dust extraction. See ワイヤーソーイングにおける冷却と潤滑 for the supporting selection questions.
Diamond Wire Structure and Abrasive Condition
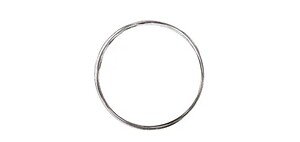
Continuous diamond wire is a coated abrasive tool. Its performance depends on carrier consistency, diamond grain, abrasive exposure, coating distribution and loop quality. It should not be described as a series of diamond beads attached to a steel cable; that construction belongs to other wire-saw categories.
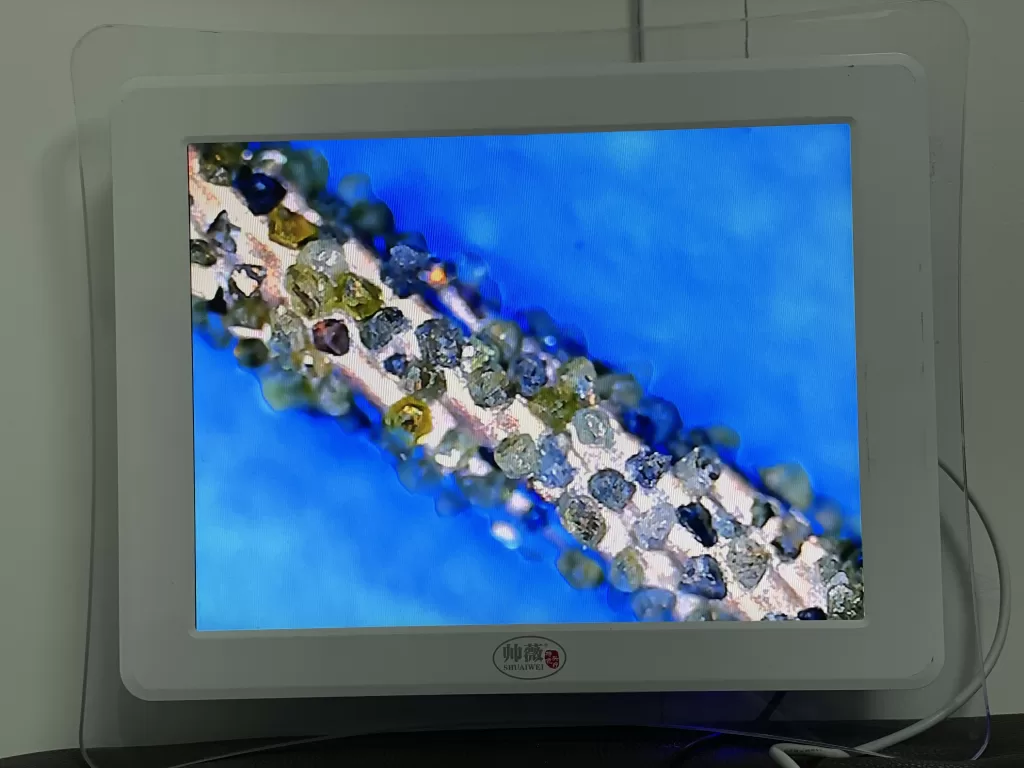
As abrasive exposure changes, a previously stable feed rate may no longer produce the same result. Inspect the wire when cutting time rises, load trends change, the surface becomes irregular or tracking becomes less stable. Available diameters and coating structures should be selected from the actual material and process restriction; use the diamond wire specification page for product-level matching.
Cutting Speed and Quality Troubleshooting
| Observed symptom | Possible causes to check | Adjustment direction |
|---|---|---|
| Cutting becomes slower | Loaded or worn abrasive, insufficient debris removal, low effective speed, excessive contact depth | Inspect the wire and coolant/dust path first; verify speed and feed against the last stable record |
| Wire wanders or the cut bows | Low tension, excessive feed, poor alignment, weak workpiece support or deep engagement | Reduce engagement, verify alignment and support, then adjust tension within the approved range |
| Rough or periodically marked surface | Vibration, wheel runout, inconsistent loop, unstable feed or debris trapped in the kerf | Inspect the mechanical path and flushing before increasing speed |
| Edge chipping increases | Abrupt entry/exit, excessive feed, unsupported edge, internal material defects | Improve support, moderate feed near the edge and review cut direction |
| Wire life falls | Excess tension, heat, misalignment, aggressive feed or unsuitable coating | Return to the last stable settings and inspect wheels, wire path and material compatibility |
| Cut stops or overload rises | Feed demand exceeds abrasive removal, debris blockage, fixture movement or local hardness change | Pause safely, clear the cutting zone, verify the fixture and restart from a reduced feed |
A Controlled Parameter Adjustment Sequence
- Define the acceptance criteria. Record material, dimensions, kerf, edge, surface, straightness and cycle-time targets.
- Confirm the mechanical baseline. Check wheel alignment, guide condition, fixture rigidity, wire tracking and coolant or dust extraction.
- Establish a conservative stable cut. Use the approved machine and wire ranges rather than an unverified value copied from another material.
- Change one variable. Adjust feed, speed, tension or debris control separately so the result can be attributed to that change.
- Measure the complete result. Record time, load trend, kerf, surface, edge quality and wire condition.
- Repeat the winning condition. A setting is useful only after it produces comparable results on more than one representative sample.
Parameter Test Record
| Record field | Details to capture |
|---|---|
| 加工ワークピース | Material grade, dimensions, density or condition, cut depth and fixture method |
| ワイヤー | Diameter, coating type, abrasive specification, loop length and prior usage |
| Machine settings | Wire speed, tension, feed strategy and any programmed changes near entry/exit |
| Cooling/debris control | Wet or dry method, fluid, flow direction, filtration or dust extraction |
| Measured result | Cut time, kerf, straightness, flatness, surface and edge condition |
| Process observations | Load trend, vibration, sound, temperature, interruptions and wire condition |
Application Video
The retained video provides a cutting example. Use it to observe the process layout, not to copy settings without confirming material, wire, dimensions and machine configuration.

よくある質問
Which setting should be increased first to improve cutting speed?
There is no universal first increase. Verify wire condition, alignment and debris removal, establish a stable baseline, then change only one variable. Feed is often the visible production control, but it must remain compatible with wire speed and tension.
Does higher wire speed always shorten the cut?
No. Higher speed can increase abrasive contacts, but excessive speed may add heat, vibration and wear. The useful range depends on the wire, material, wheel system, coolant and feed.
Why does the wire bow when feed rate increases?
The requested material-removal rate may exceed the wire’s stable cutting capacity. Check tension, alignment, abrasive condition, debris clearance, workpiece support and cut depth before increasing feed again.
How should parameters be transferred to a new material?
Use the previous record only as a conservative starting reference. Confirm the new material grade, geometry, coolant restriction and quality target, then develop and repeat a representative test cut.
When should the diamond wire be replaced?
Replace or investigate the wire when removal rate, surface, kerf or tracking changes beyond the approved process window. Also inspect for local damage, coating loss and abnormal behavior around the loop.
結論
Diamond wire cutting efficiency improves when speed, tension, feed, cooling and abrasive condition are developed together. Start with a mechanically sound system, change one variable at a time and judge every gain against cut quality, stability and wire utilization. For equipment-level selection after the process requirements are defined, review the ワイヤーソー機械ガイド.