Введение: Точность — это рабочий процесс, а не кнопка.
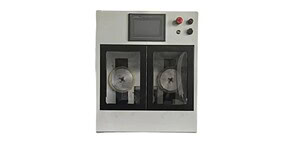
Процесс резки алмазной проволочной пилой представляет собой контролируемый инженерный процесс, определяющий точность резки, целостность поверхности и повторяемость при обработке твердых и хрупких материалов.
В лабораториях материаловедения и на предприятиях полупроводникового производства резка часто является наиболее важным этапом в цепочке подготовки образцов. Некачественная резка приводит к образованию микротрещин, остаточных напряжений и конусности толщины, которые невозможно полностью устранить с помощью последующей притирки или полировки.
Используя алмаз проволочная пила Таким образом, дело не в нажатии кнопки запуска, а в рабочем процессе, который строится на основе возможностей машины. внутренняя структура и механическая стабильность.Это дисциплинированный процесс, требующий пристального внимания. крепление, координация параметров, и мониторинг процессов в режиме реального времени. В данном техническом руководстве описана стандартная рабочая процедура (СОП) для достижения точности нарезки на микронном уровне с использованием алмазной проволочной пилы, с акцентом на повторяемость и стабильность процесса.

Этап 1: Процесс резки алмазной проволочной пилой – подготовка заготовки и крепление.
Перед включением станка необходимо обеспечить надлежащее механическое соединение между заготовкой и станком. Вибрация в месте крепления заготовки так же вредна, как и вибрация в самой проволоке.
1.1 Жертвенный слой (концепция фиктивной планки)
Опытные инженеры никогда не прорезают хрупкий материал напрямую в металлических тисках.
Проблема:
Когда алмазная проволока выходит за нижнюю поверхность хрупких материалов, таких как карбид кремния или оптическое стекло, внезапная потеря опоры приводит к сколам, отколам по краям или образованию трещин под поверхностью.
Решение:
Прикрепите заготовку к жертвенному слою — обычно это графит, эпоксидная смола или фенольная смола. Проволока полностью прорезает образец и продолжается в жертвенный слой, обеспечивая сохранение сжимающих сил до момента окончательного разделения.
1.2 Способы монтажа
Для разных областей применения требуются разные стратегии крепления, которые подробно описаны в нашей документации. Руководство по проектированию и монтажу светильников:
- Термопластичный воск Подходит для небольших, хрупких или неровных образцов. Образец нагревается примерно до 80 °C, закрепляется на графитовом стержне и охлаждается. Этот метод обеспечивает фиксацию без напряжения, но не подходит для тяжелой промышленной резки.
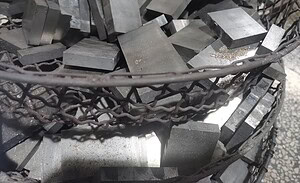
- Прецизионные механические тиски Используется для слитков большего размера или для нарезки в процессе производства. Силу зажима необходимо тщательно контролировать, чтобы избежать деформации кристаллической решетки.
- Вакуумный патрон Обычно используется для нарезки тонких пластин с предварительно выровненных поверхностей. Для равномерного распределения вакуумного давления и предотвращения локальной деформации необходим пористый керамический зажим.
Этап 2: Настройка и проверка оборудования.
2.1 Навинчивание проволоки и контроль качества
При установке новой ромбовидной проволочной петли необходимо провести несколько проверок:
- Устранение поворота Убедитесь, что проволочная петля не перекручена. Перекрученная проволока ведет себя как винтовая резьба и оставляет периодические спиральные следы на поверхности среза.
- Сиденье с направляющим колесом Убедитесь, что проволока полностью вошла в V-образные канавки всех направляющих колес. Частичное вхождение приводит к боковой нестабильности и ускоренному износу канавок.
2.2 Калибровка натяжения
- Статическая проверка Активируйте пневматическую систему натяжения и убедитесь, что достигнуто номинальное значение натяжения.
- Динамическая проверка Пропускайте проволоку на низкой скорости (приблизительно 5 м/с). Показания натяжения на человеко-машинном интерфейсе должны оставаться стабильными. Колебания, превышающие ±1 Н, обычно указывают на биение направляющего колеса, трение в подшипниках или загрязнение.
2.3 Обнуление по оси Z (касание)
Точная толщина среза зависит от точного позиционирования по оси Z.
- Акустический метод Медленно опускайте проволоку, пока циркулирует охлаждающая жидкость. Когда звук изменится с тихого шипения на отчетливый контактный шум, установите нулевое положение по оси Z.
- Обнаружение электрического контакта Для проводящих материалов, таких как кремний, в некоторых системах используется электрическая цепь обеспечения непрерывности для обнаружения первого контакта с чувствительностью на микронном уровне.
Этап 3: Оптимизация параметров – Рецепт резки
Качество резки определяется взаимодействием трех параметров, часто называемых «золотым треугольником»: скоростью проволоки, скоростью подачи и натяжением, которые подробно описаны в нашей статье. руководство по настройке параметров резки.
3.1 Скорость вращения проводов
Принцип:
Более высокая скорость вращения проволоки снижает усилие резания на одно абразивное зерно за счет распределения удаляемого материала между более активными алмазными частицами.
- Твердые материалы (SiC, сапфир): 40-60 м/с
- Материалы средней твердости (кремний, кварц): 25–40 м/с
- Мягкие материалы (графит): 20–30 м/с
Чрезмерная скорость при обработке мягких материалов увеличивает тепловыделение и ускоряет износ проволоки, не улучшая при этом качество резки.
3.2 Скорость подачи и изгиб проволоки
Скорость подачи определяет, с какой скоростью проволока продвигается в материал.
Если скорость подачи слишком высока, проволока изгибается назад в центре разреза, образуя раструбообразные или сужающиеся к концу срезы.
Типичные начальные значения:
- SiC: 0,2–0,5 мм/мин
- Стекло / Кварц: 1,0–3,0 мм/мин
- Графит: более 10 мм/мин
Скорость подачи следует всегда увеличивать постепенно, контролируя при этом стабильность резания.
3.3 Динамическое натяжение
Более высокое натяжение улучшает прямолинейность и уменьшает колебания толщины, но также увеличивает риск обрыва проволоки.
Общее правило:
Установите рабочее натяжение на уровне 80–90 % от предела упругости проволоки. Для стандартной бесконечной петли диаметром 0,35 мм типичный диапазон составляет 18–22 Н в зависимости от твердости материала и глубины реза.
Этап 4: Мониторинг цикла резки и процесса.
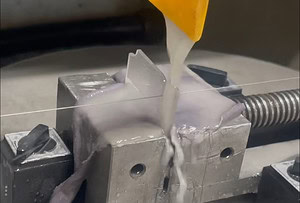
4.1 Стратегия охлаждения
- Способ доставки Форсунки системы охлаждения должны быть направлены непосредственно на точку входа проволоки, чтобы жидкость двигалась вместе с проволокой в пропил. Правильная подача охлаждающей жидкости имеет решающее значение для терморегулирования и удаления мусора, как более подробно объяснено в нашем разделе. руководство по оптимизации охлаждающей жидкости.
- Характеристики потока Высокое давление зачастую эффективнее большого объема, поскольку оно разрушает воздушный барьер, окружающий высокоскоростной провод.
4.2 Управление входом на рынок (мягкий старт)
Наиболее важным моментом в процессе резки алмазной проволочной пилой является первоначальный контакт.
Стандартная практика:
Снизьте скорость подачи примерно на 50 % на первые 2–5 мм глубины резания. Такой плавный пуск минимизирует ударную нагрузку, уменьшает сколы на входе проволоки и снижает риск ее обрыва.
4.3 Слуховой мониторинг
Опытные операторы контролируют процесс с помощью звука:
- Непрерывное шипение: Обычная резка
- Пульсирующий или глухой звук: Резонанс проволоки или дефект направляющего колеса.
- Визг: Недостаток охлаждающей жидкости или чрезмерная скорость подачи
Слуховые признаки часто выявляют проблемы еще до того, как они проявятся при поверхностных измерениях.
Этап 5: Последующая обработка
После завершения резки:
- Осторожно отступите Медленно поднимайте проволоку, чтобы не зацепить только что отделившийся кусочек.
- Немедленная уборка Тщательно промойте образец. Засохшая суспензия может затвердеть и испачкать поверхность.
- Измерение Для проверки стабильности процесса измерьте общее изменение толщины в центре и по краям с помощью микрометра или толщиномера.
Заключение
Конюшня процесс резки алмазной проволочной пилой Процесс резки определяется не одним параметром, а тщательной настройкой, скоординированным контролем параметров и непрерывным мониторингом на протяжении всего процесса. При правильной настройке крепления, скорости подачи проволоки, натяжения и подачи охлаждающей жидкости алмазные проволочные пилы превращаются из простых режущих инструментов в прецизионные системы резки, способные обеспечить точность на микронном уровне.
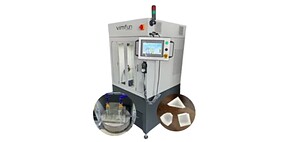
Узнайте больше о том, как проектирование машин поддерживает этот рабочий процесс, в нашем разделе системы алмазных проволочных пил.
ЧАСТО ЗАДАВАЕМЫЕ ВОПРОСЫ
В1: Как рассчитать правильную скорость подачи?
Универсальной формулы не существует. Начинайте с умеренных доз и следите за прогибом проволоки и качеством поверхности. Ступенчатые метки обычно указывают на чрезмерную скорость подачи.
Вопрос 2: Следует ли выполнять резку алмазной проволокой всухом или во влажном режиме?
Влажная резка необходима практически во всех областях применения. Охлаждающая жидкость смазывает поверхность, отводит тепло и удаляет стружку. Сухая резка приводит к быстрому износу проволоки.
Вопрос 3: Почему после среза иногда остается обрубок или «хвостик» на выходе?
Это происходит, когда заготовка не имеет опоры в точке выхода. Использование защитной пластины обеспечивает полную поддержку до тех пор, пока проволока полностью не выйдет из материала.